
If you're new to ResearchRabbit, this guide will help you go from a simple search (or a paper you already know) to building a structured view of your research field.
Unlike traditional academic search tools, ResearchRabbit doesn’t just return a list of results. It helps you explore how papers are connected, so you can discover relevant work faster and understand the landscape more deeply.
Instead of jumping between disconnected articles, you start to see how the literature fits together, which makes it easier to find what actually matters, keep your research organized as it grows.
Over time, it becomes less about searching and more about building a workflow that fits naturally into how you already research.
How ResearchRabbit works
ResearchRabbit combines search with discovery.
You can start with something simple, a keyword, a topic, or even just one paper you already know. From there, the platform builds recommendations based on how papers are connected through citations.
Instead of starting from scratch every time, you expand from what you’ve already found. As you add more relevant papers, the system improves, turning your search into a personalized discovery process, not just a one-time query.
Step 0: Create your first project
After signing up, you’ll be asked to create your first project.
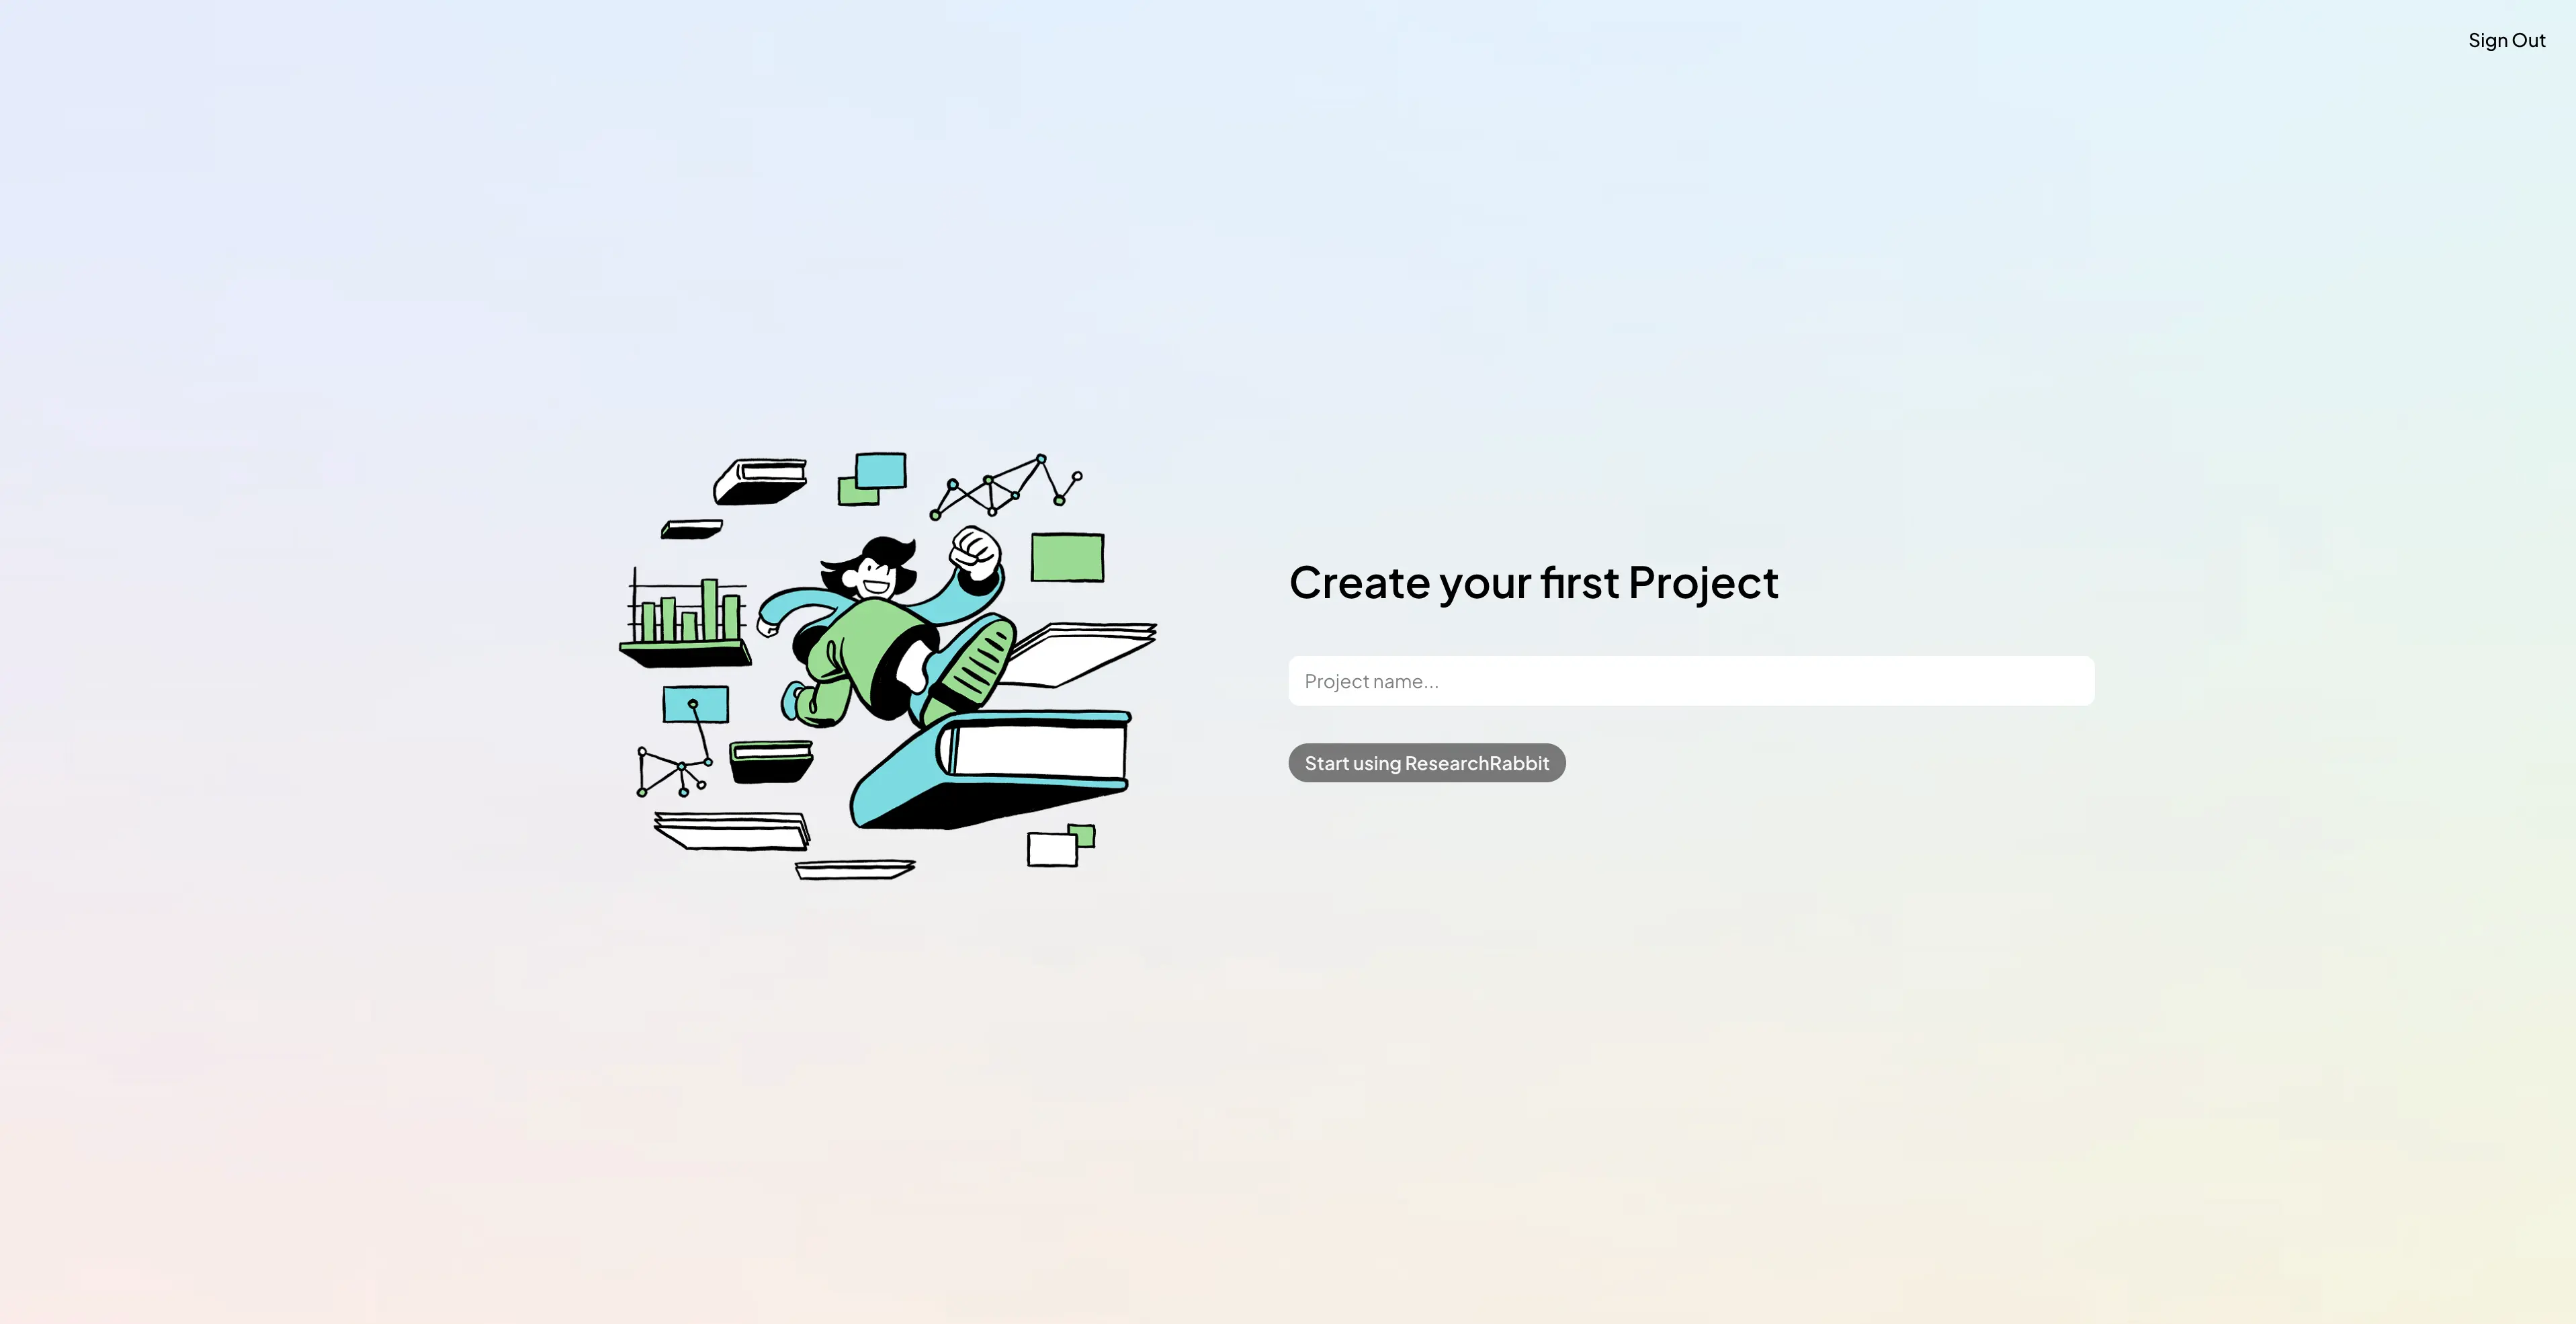
This is simply your workspace for a research topic, a place where everything you find will be organized.
Don’t worry too much about the name. It doesn’t have to be perfect. Once your project is set up, you’re ready to start exploring.
Step 1: Get familiar with the interface
When you first enter the app, it might feel a bit empty, that’s completely normal. As you start searching and saving papers, everything will begin to fill in.
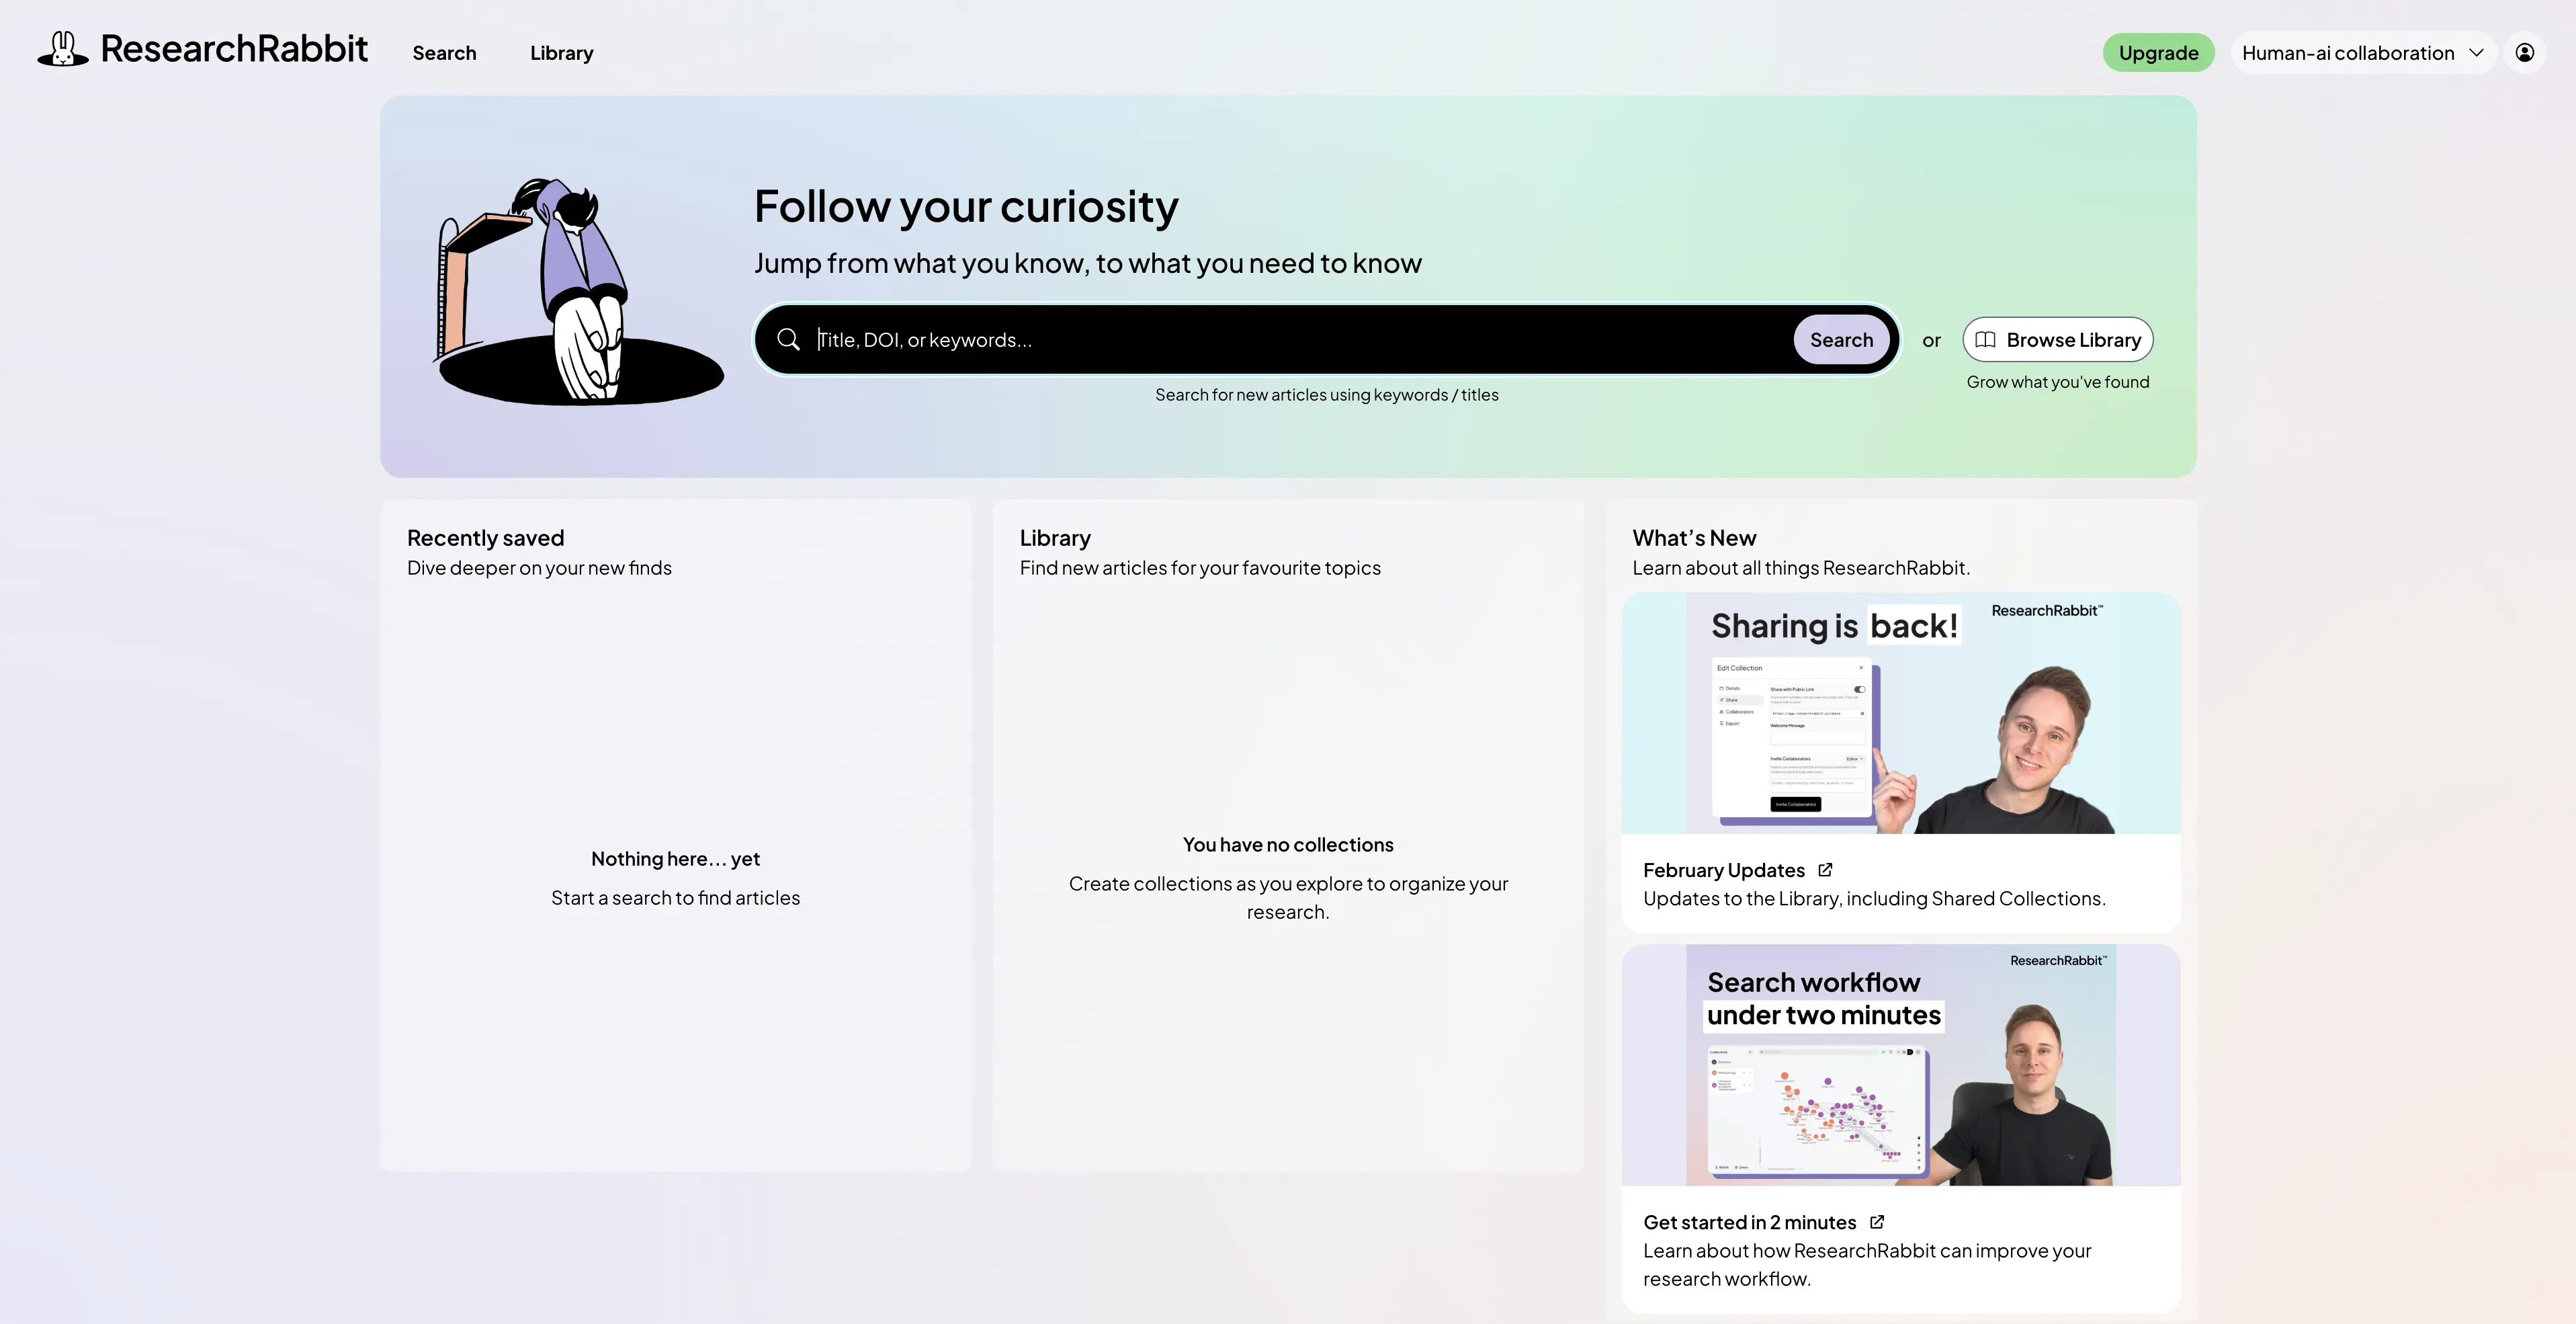
At the top, you’ll see the search bar, where you can look for papers using keywords, topics, titles, or DOIs. This is where most of your exploration begins.
You’ll also notice sections like Browse Library and Library, which become more useful once you’ve started saving papers and building your own collections. The Recently saved area helps you quickly return to papers you’ve already looked at, while What’s New highlights product updates and tips.
👉 At this stage, you don’t need to worry about using everything, just focus on starting your first search.
Step 2: Start with a search
Use the search bar to begin exploring your topic.
You can start with something simple, a keyword, a broader topic, or even a paper you already know (by title or DOI). You don’t need to get it perfect at this stage.
The goal here isn’t to find everything, but to find a few relevant papers that can act as a starting point for discovery.
Step 3: Select your seed papers
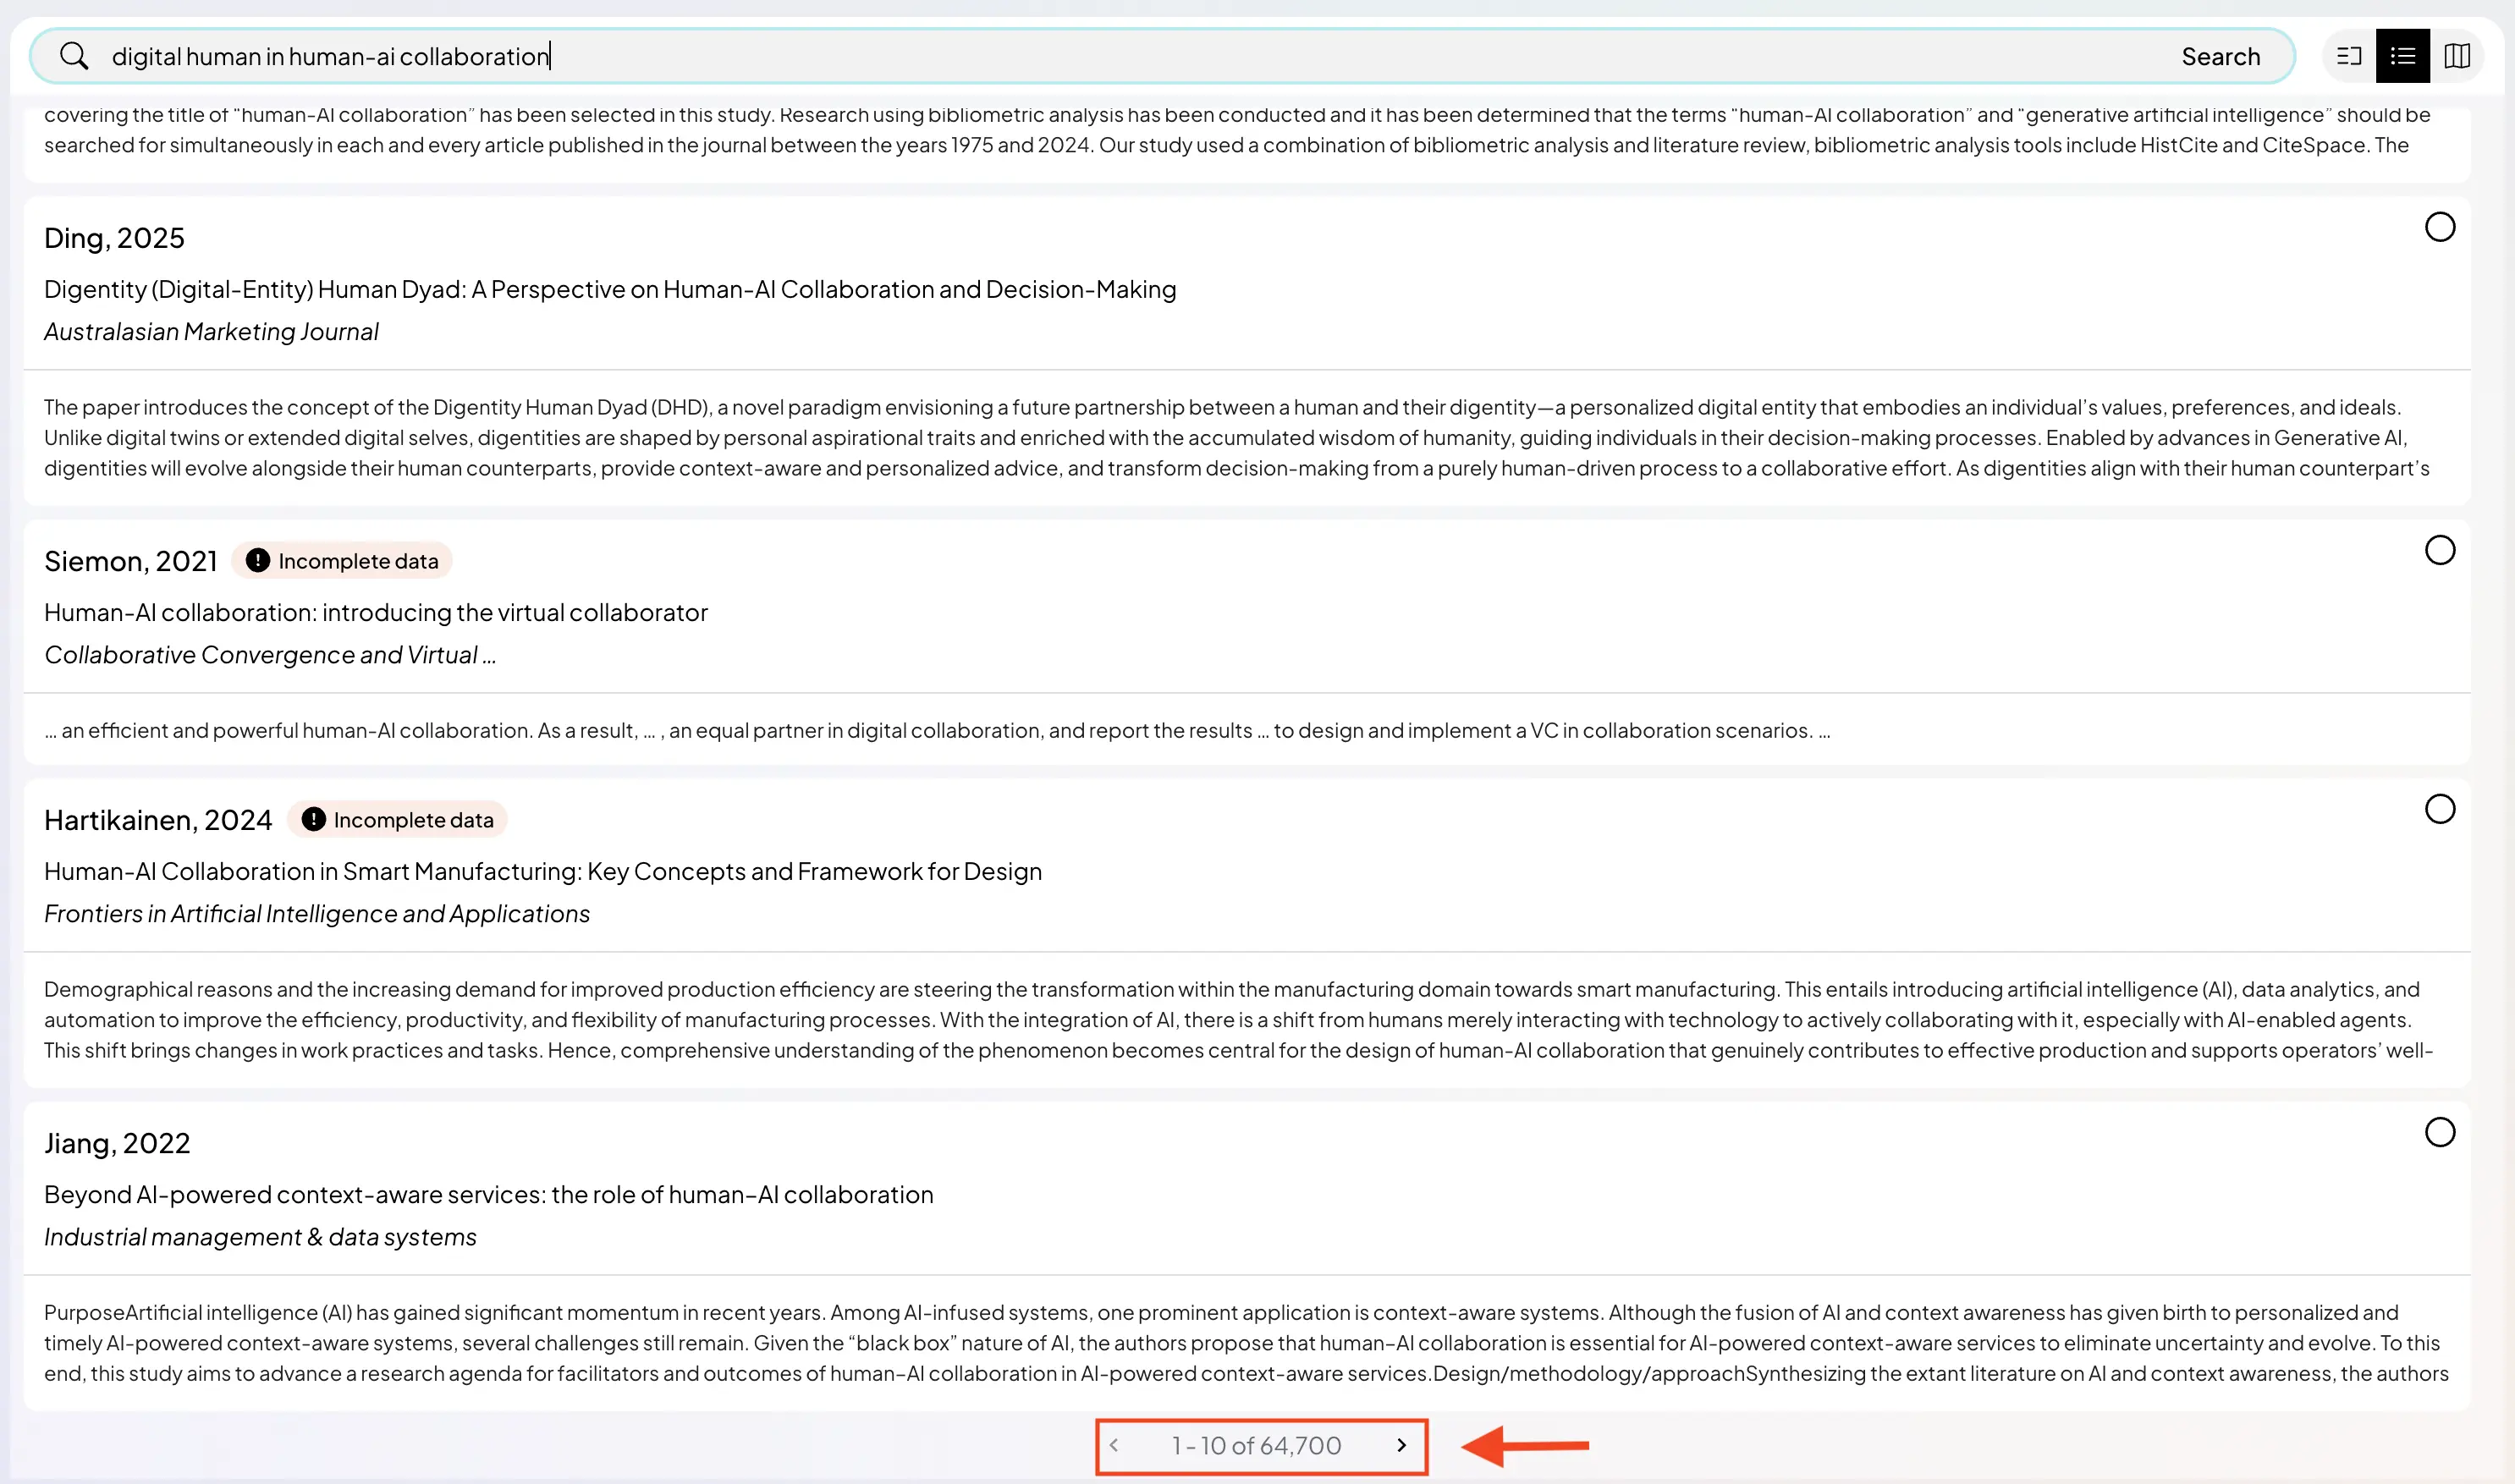
After searching, you’ll see a list of results, each showing the title, source, and a short preview. At this stage, you don’t need to read everything in detail, just scan quickly to spot papers that look relevant.
If something seems useful, you can either select it directly using the checkbox or click on it to read the full abstract before deciding.
Don’t worry if results aren’t perfect
It’s completely normal if the first results aren’t ideal. Try scrolling and clicking Next to explore more options; good starting papers aren’t always on the first page.
Build your seed set
Once you’ve found a few relevant papers, select them and click Search.
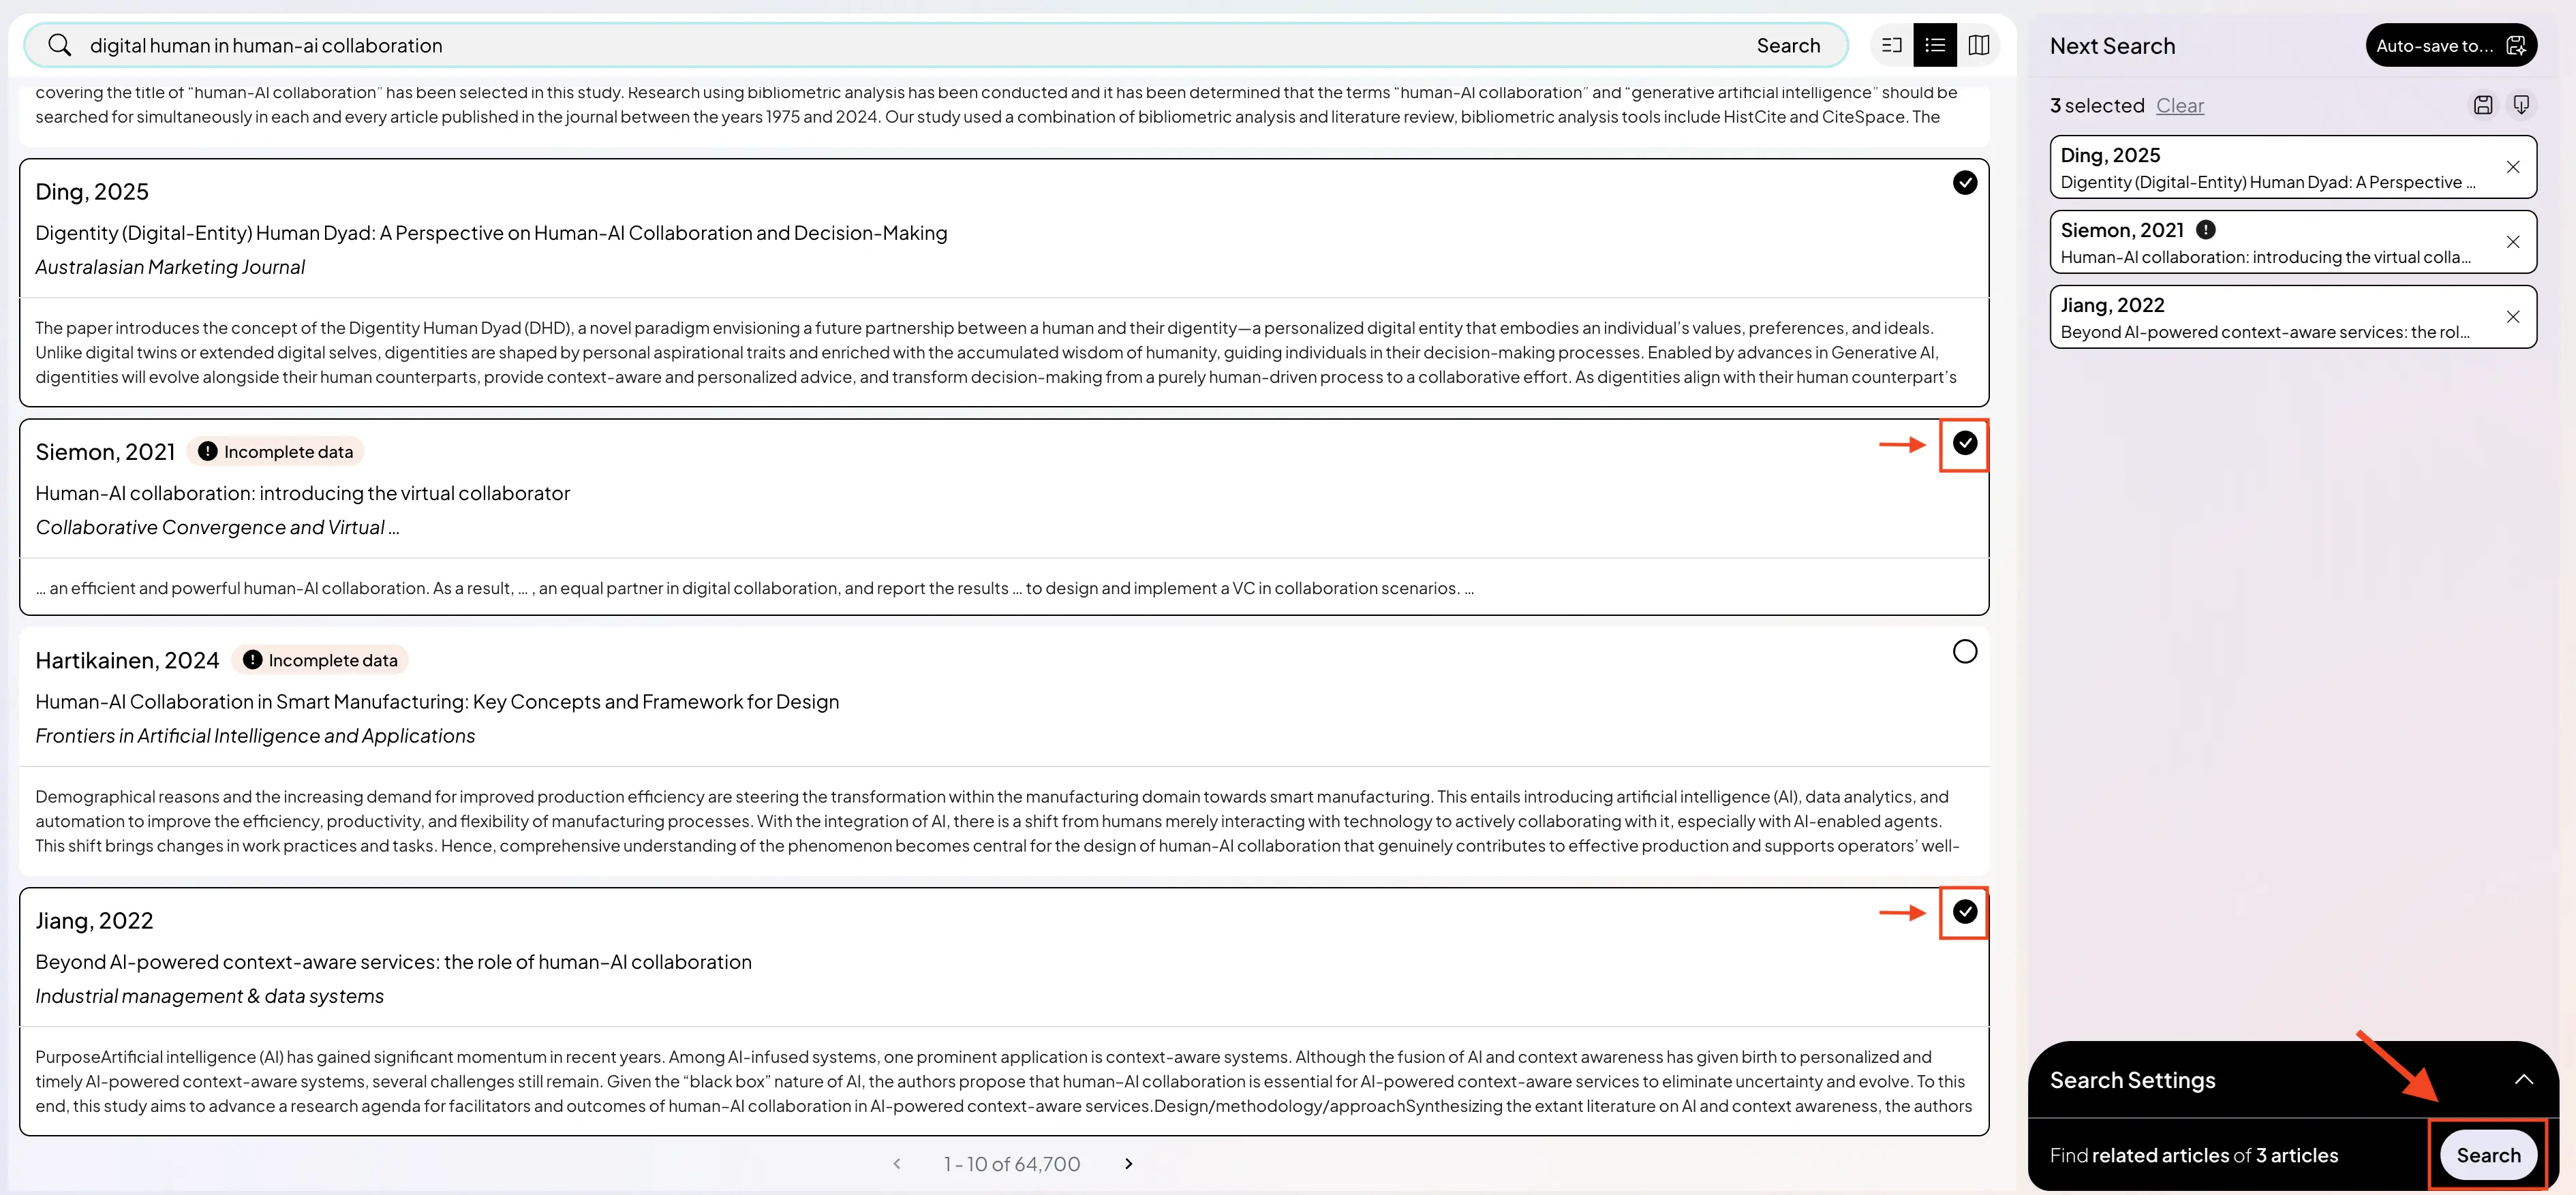
These become your seed papers, which define what ResearchRabbit will explore next. A small but thoughtful set is usually enough to get started.
💡 It helps to include:
- at least one well-cited (foundational) paper
- and one more recent paper
This gives you a better balance between established work and newer research.
Step 4: Explore the citation map
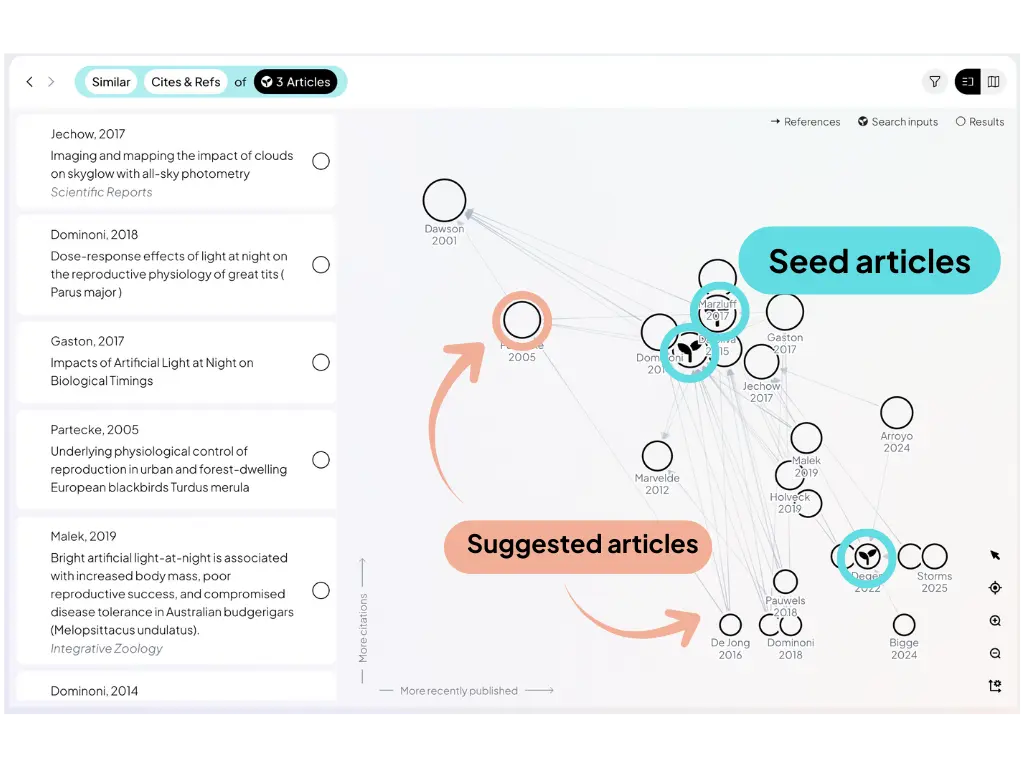
After clicking Search, you’ll enter the graph view, and this is where ResearchRabbit really starts to feel different.
Instead of a list of results, you’ll see papers connected through citations. The papers you selected appear as your seed papers 🌱, and around them, a network of related research begins to form.
👉 At this point, you’re no longer just searching, you’re exploring a research network.
How to read the map
At the bottom of the screen, you’ll see simple directional hints:
- Higher (↑) → more cited (more influential)
- Right (→) → more recent
This makes it easy to quickly understand what shaped the field and what’s happening now.
Understanding patterns
As you explore, you’ll start noticing patterns.
Papers tend to group together into clusters, and each cluster often reflects a subtopic or a particular research direction. This is where things become more intuitive — you’re not just finding papers, you’re starting to see how a field is structured.
👉 This helps you identify key themes and spot areas that might need further exploration.
Interacting with the map
Each circle represents a paper. You can click on any node to open it, read the abstract, and decide whether it’s relevant to your work.
Instead of jumping between disconnected results, you can move through the literature by following these connections.
Navigating between tabs
At the top-left, you’ll see a set of circular tabs.

Each one represents a different search or map you’ve opened, and the one with the 🐰 icon shows your current workspace. You can click between them to switch views, compare different directions, or return to something you explored earlier.
👉 This makes it easy to move between ideas without losing your place.
Step 5: Work with individual papers
When you open a paper, this is where things become more hands-on. Instead of just reading, you can start building your own understanding and organizing what matters.
1. Add notes
Use the Notes tab to write down what you’ve understood from the paper.
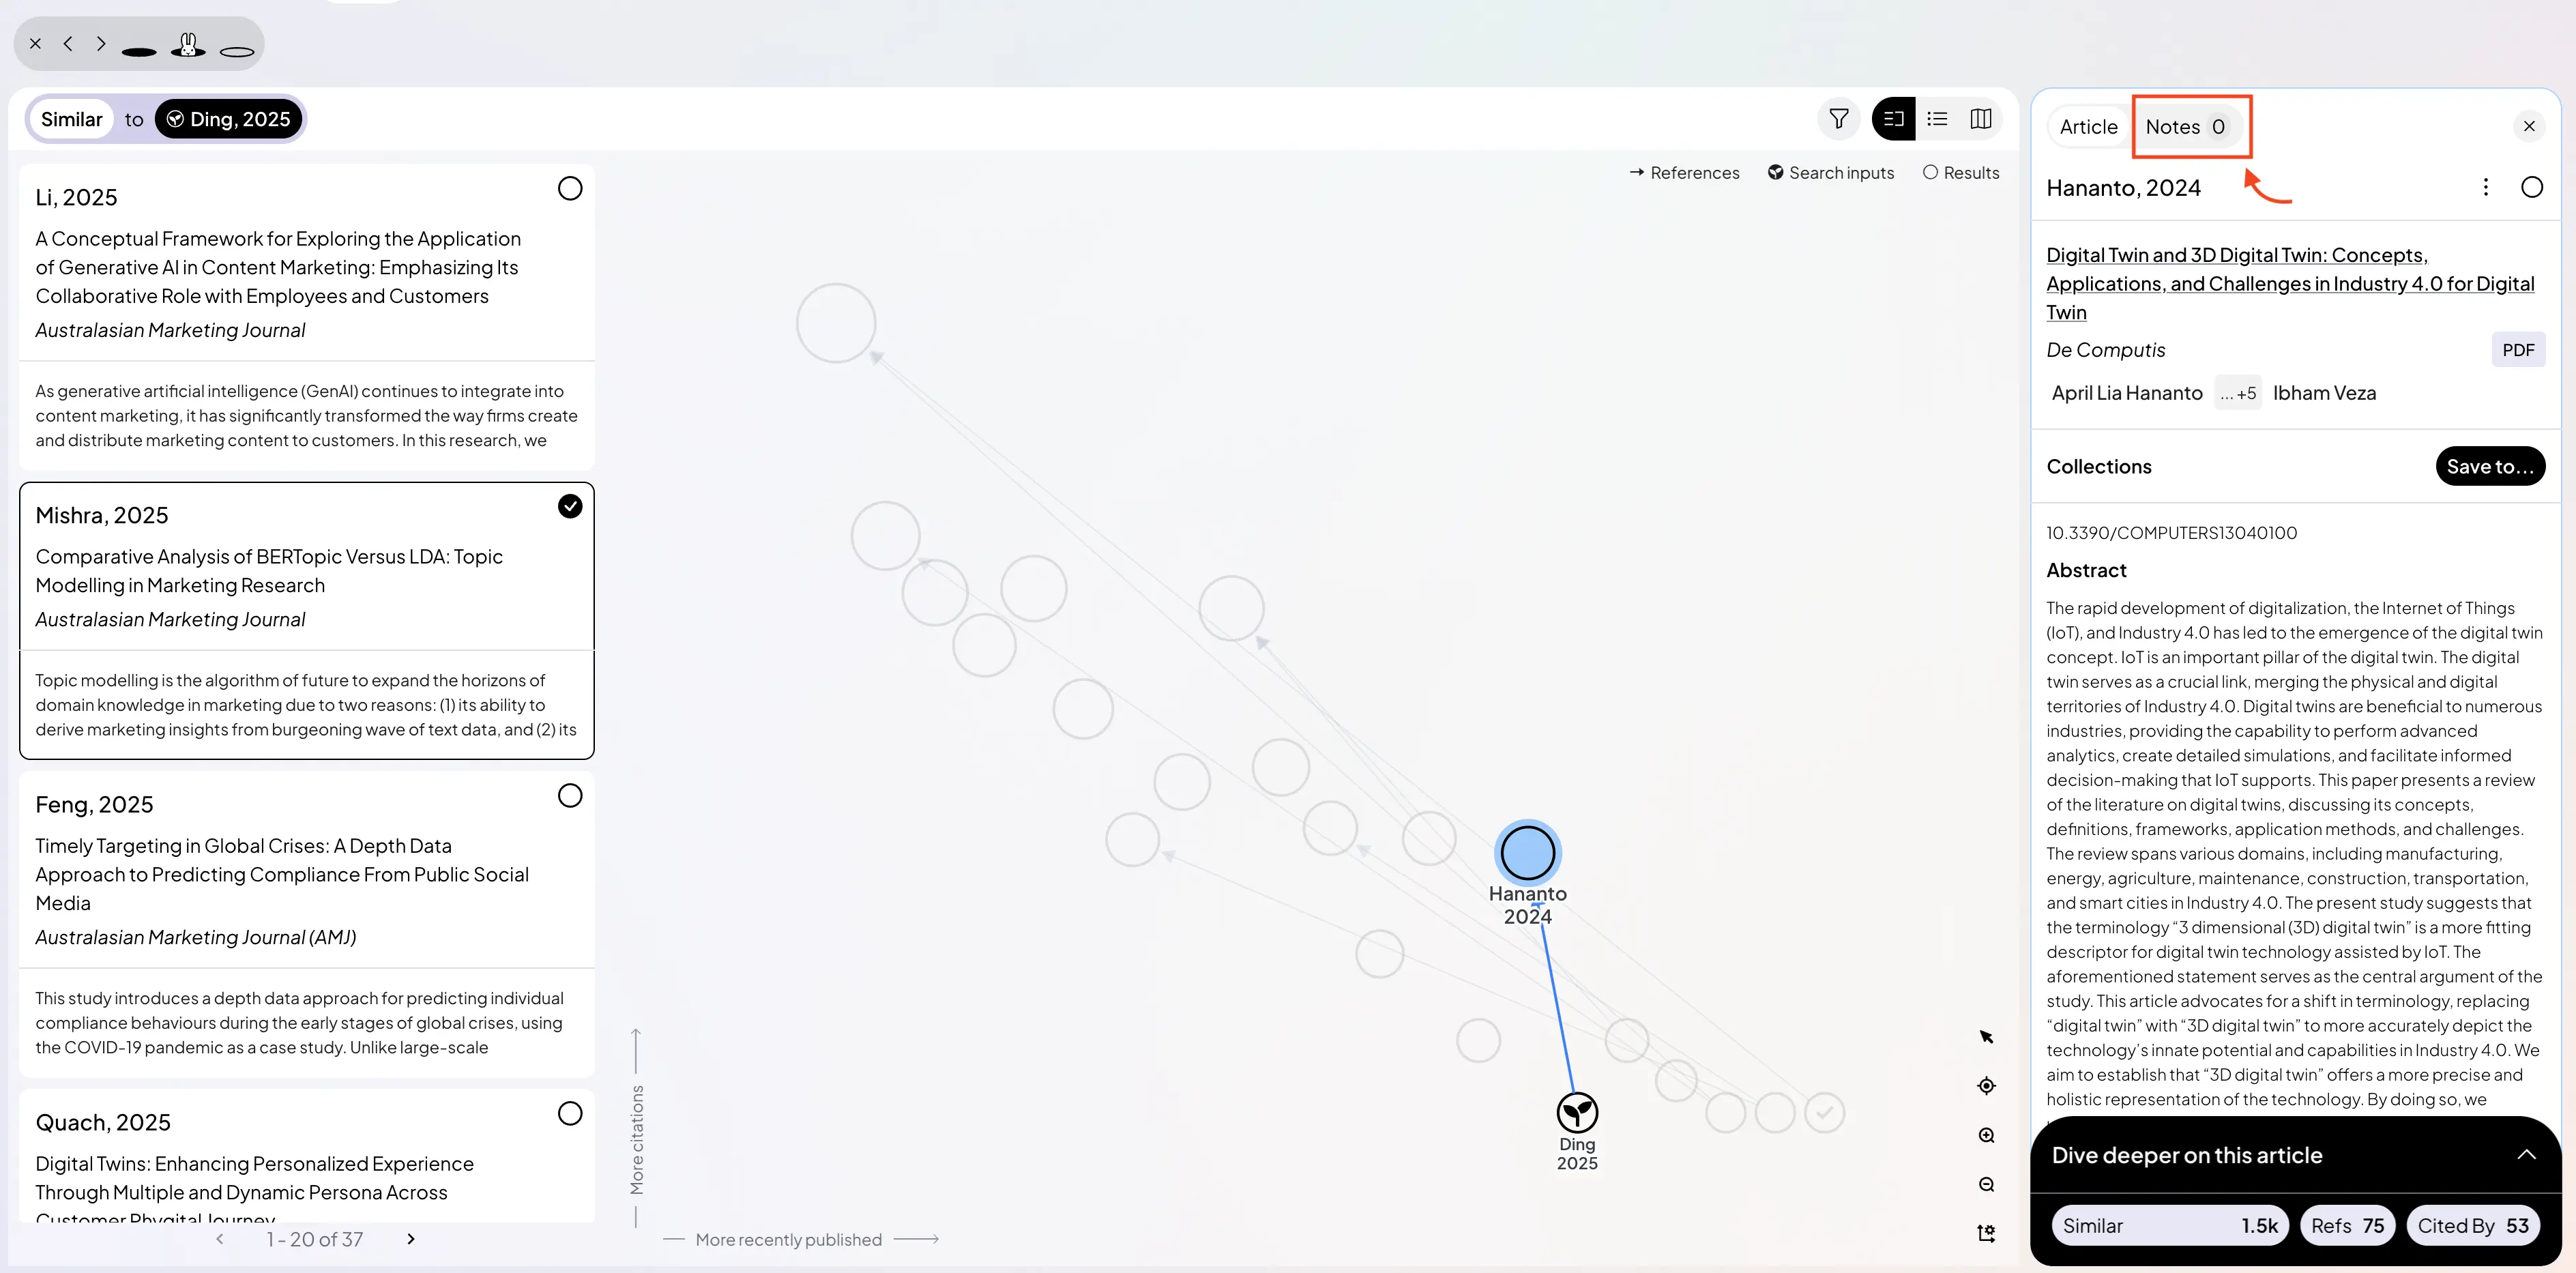
This can include key insights, important findings, or anything that stands out to you. Writing things in your own words helps you process the material, not just collect it.
👉 This is what turns reading into actual understanding.
2. Save to collections
If a paper is important or relevant to your work, it’s a good idea to save it to a collection so you can easily find it later.
Click Save to…, then either choose an existing collection or create a new one. When creating a collection, you simply give it a name, choose a color, and click Create.
Once it’s set up, you can keep adding related papers to the same collection over time, there’s no need to recreate it each time.
👉 Over time, your collections become a structured view of your research.
3. Explore deeper: Similar, References, Cited By
At the bottom of each paper, you’ll see three options: Similar, References, and Cited By.
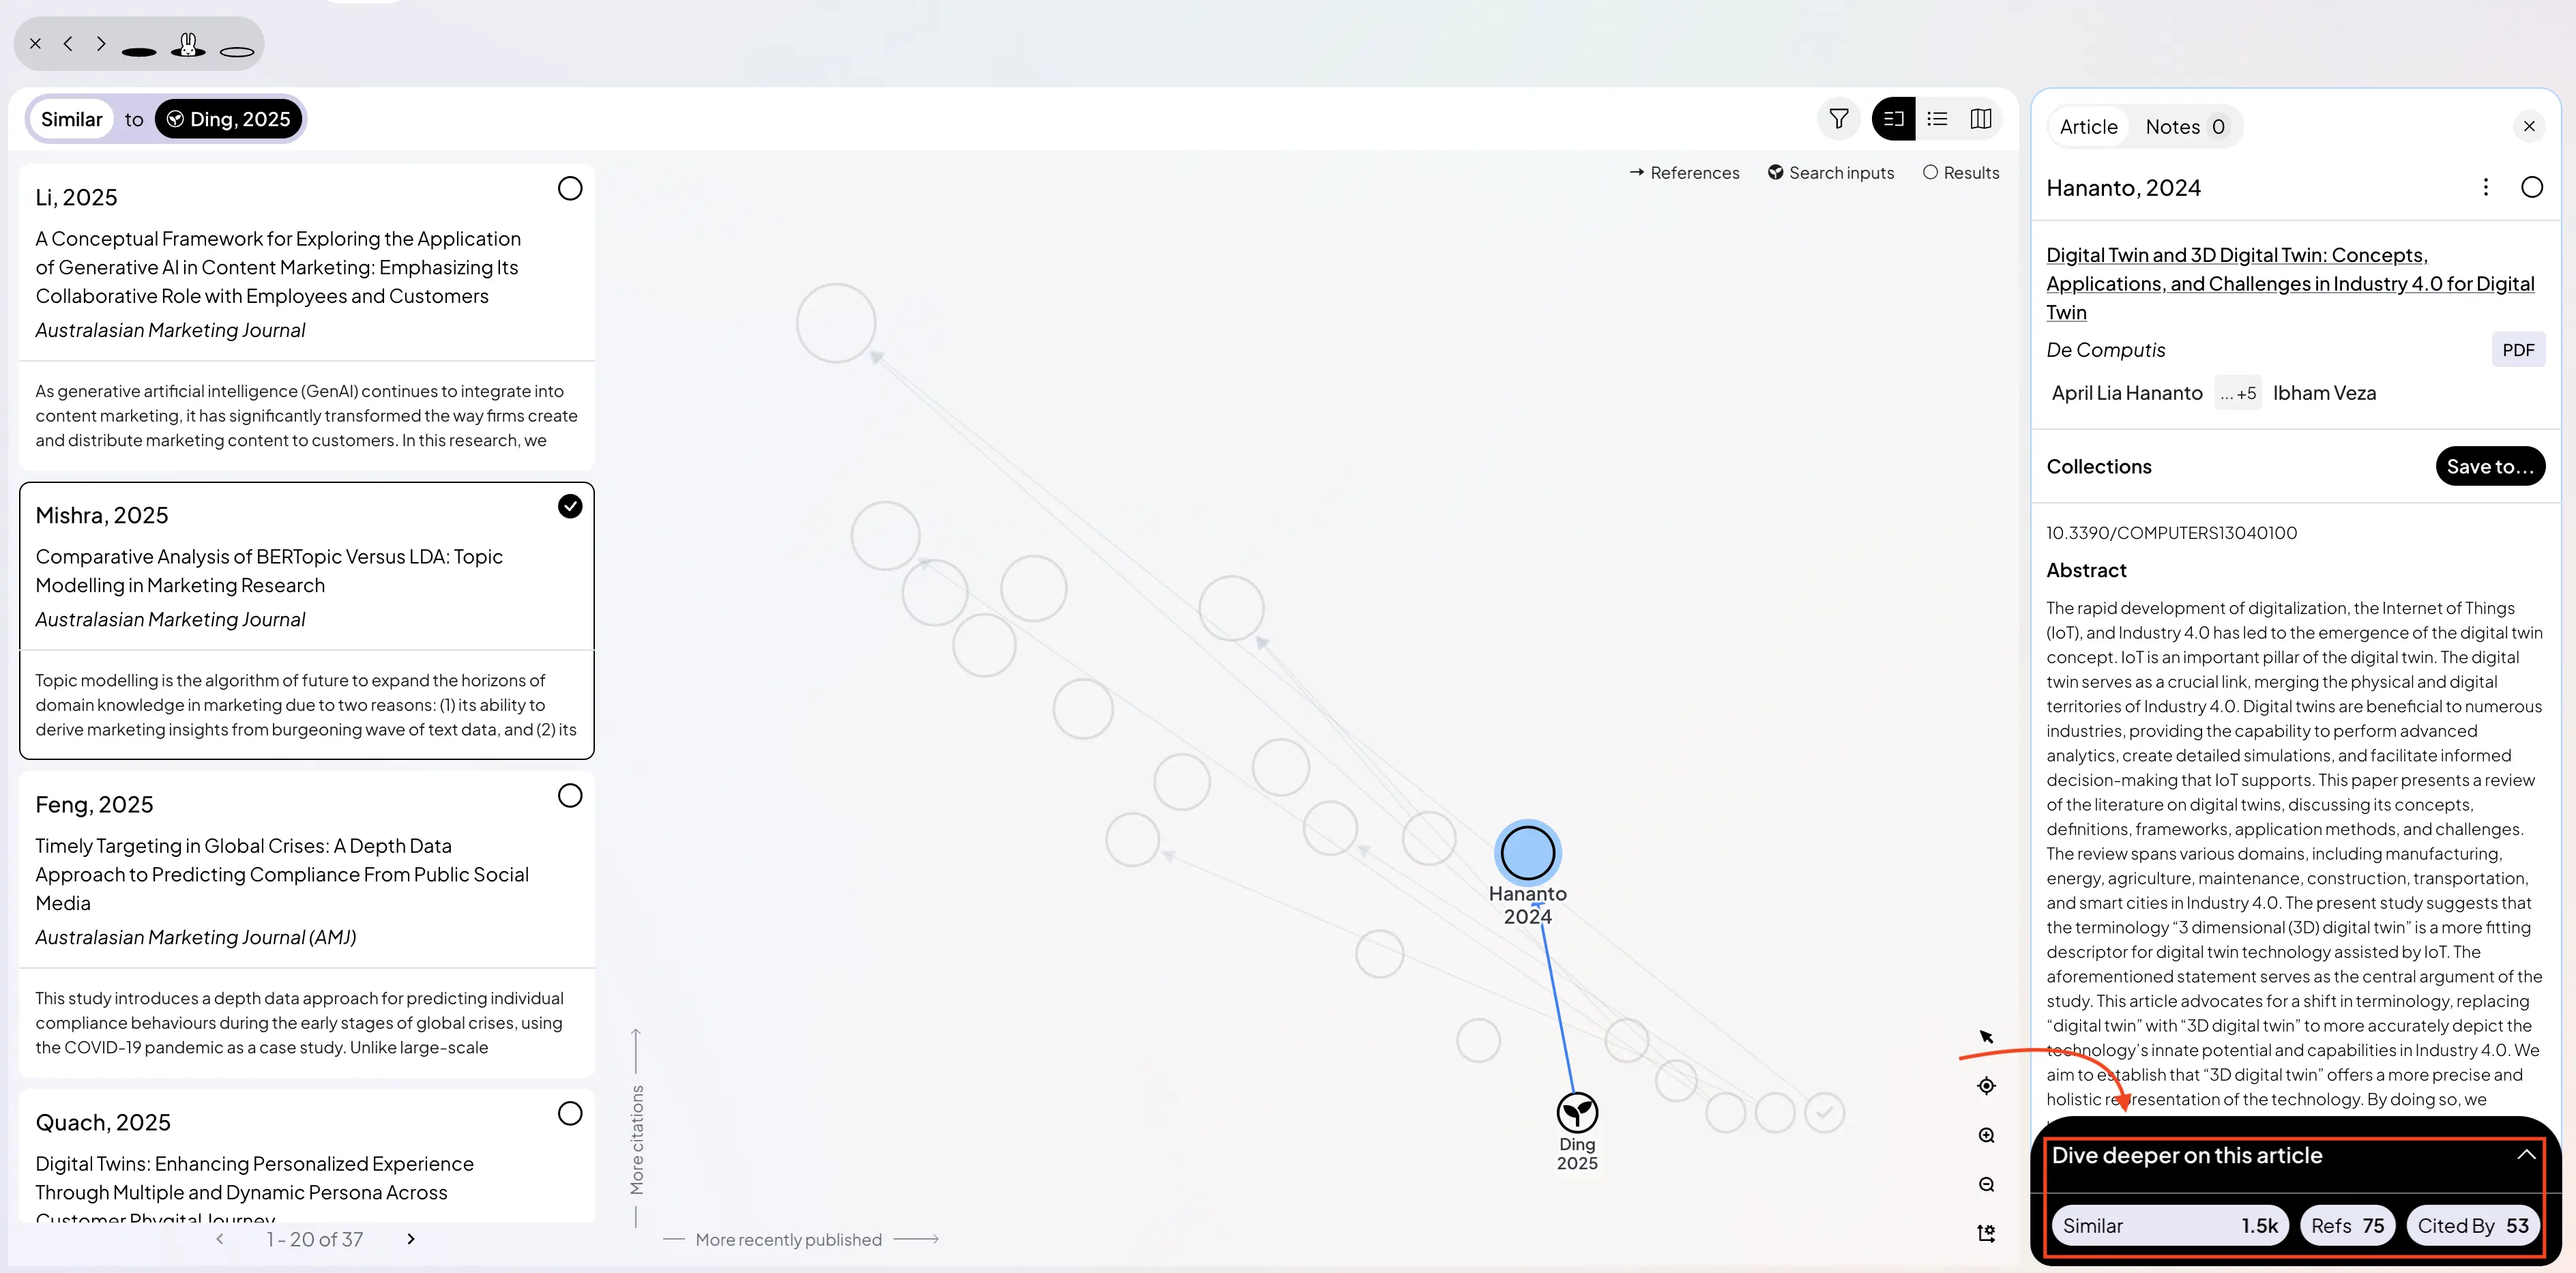
Each one opens a new map and lets you explore the literature from a different angle:
- Similar → papers on closely related topics
- References → earlier work this paper builds on
- Cited By → newer papers that build on this one
This allows you to move naturally through the field, exploring sideways, going back to foundational work, or moving forward to more recent research.
👉 In practice, this means you’re not just reading papers, you’re exploring how research evolves over time.
Step 6: Iterate and refine
This isn’t a one-time process.
As you explore, you’ll often come across better papers, add them to your search, and run it again. Each round helps ResearchRabbit refine what it shows you next.
👉 In other words, the more thoughtfully you interact with it, the better your results become.
Over time, your map becomes more accurate, more relevant to your topic, and more complete. Instead of starting from scratch each time, you gradually build a clearer and more useful view of the literature.
Real-World Use Cases: When ResearchRabbit Makes a Difference
Whether you’re just starting a literature review or deep in the final stages of writing, ResearchRabbit can support your work at every step. Here are a few situations where it really shines:
Final thoughts
ResearchRabbit isn’t just a search tool.
It helps you move beyond collecting papers and start making sense of them, discovering relevant work, understanding how ideas connect, and organizing your thinking as you go.
👉 By combining search, exploration, and iteration, it becomes part of a complete literature review workflow, not just a way to generate another list of results.
Ready to Try It?
You can sign up for free in under a minute. Start a collection, drop in a seed paper, and see where it takes you. You might be surprised by what you discover.
FAQ
What is ResearchRabbit used for?
ResearchRabbit is used to discover and explore academic papers through their connections. Instead of relying only on keyword search, it helps you see how papers relate to each other, making it easier to understand a research field, find relevant work, and identify key studies.
Is ResearchRabbit free?
ResearchRabbit offers free access to its core features, including searching, exploring, and organizing papers.
Depending on your usage or future updates, there may be additional features or limits, so it’s always best to check the latest details on the website.
How to use ResearchRabbit?
You can start by searching for a topic, keyword, or a paper you already know. From there, select a few relevant papers and use them as your starting point. ResearchRabbit will generate a map of related work, allowing you to explore connections, discover new papers, and build your understanding step by step.
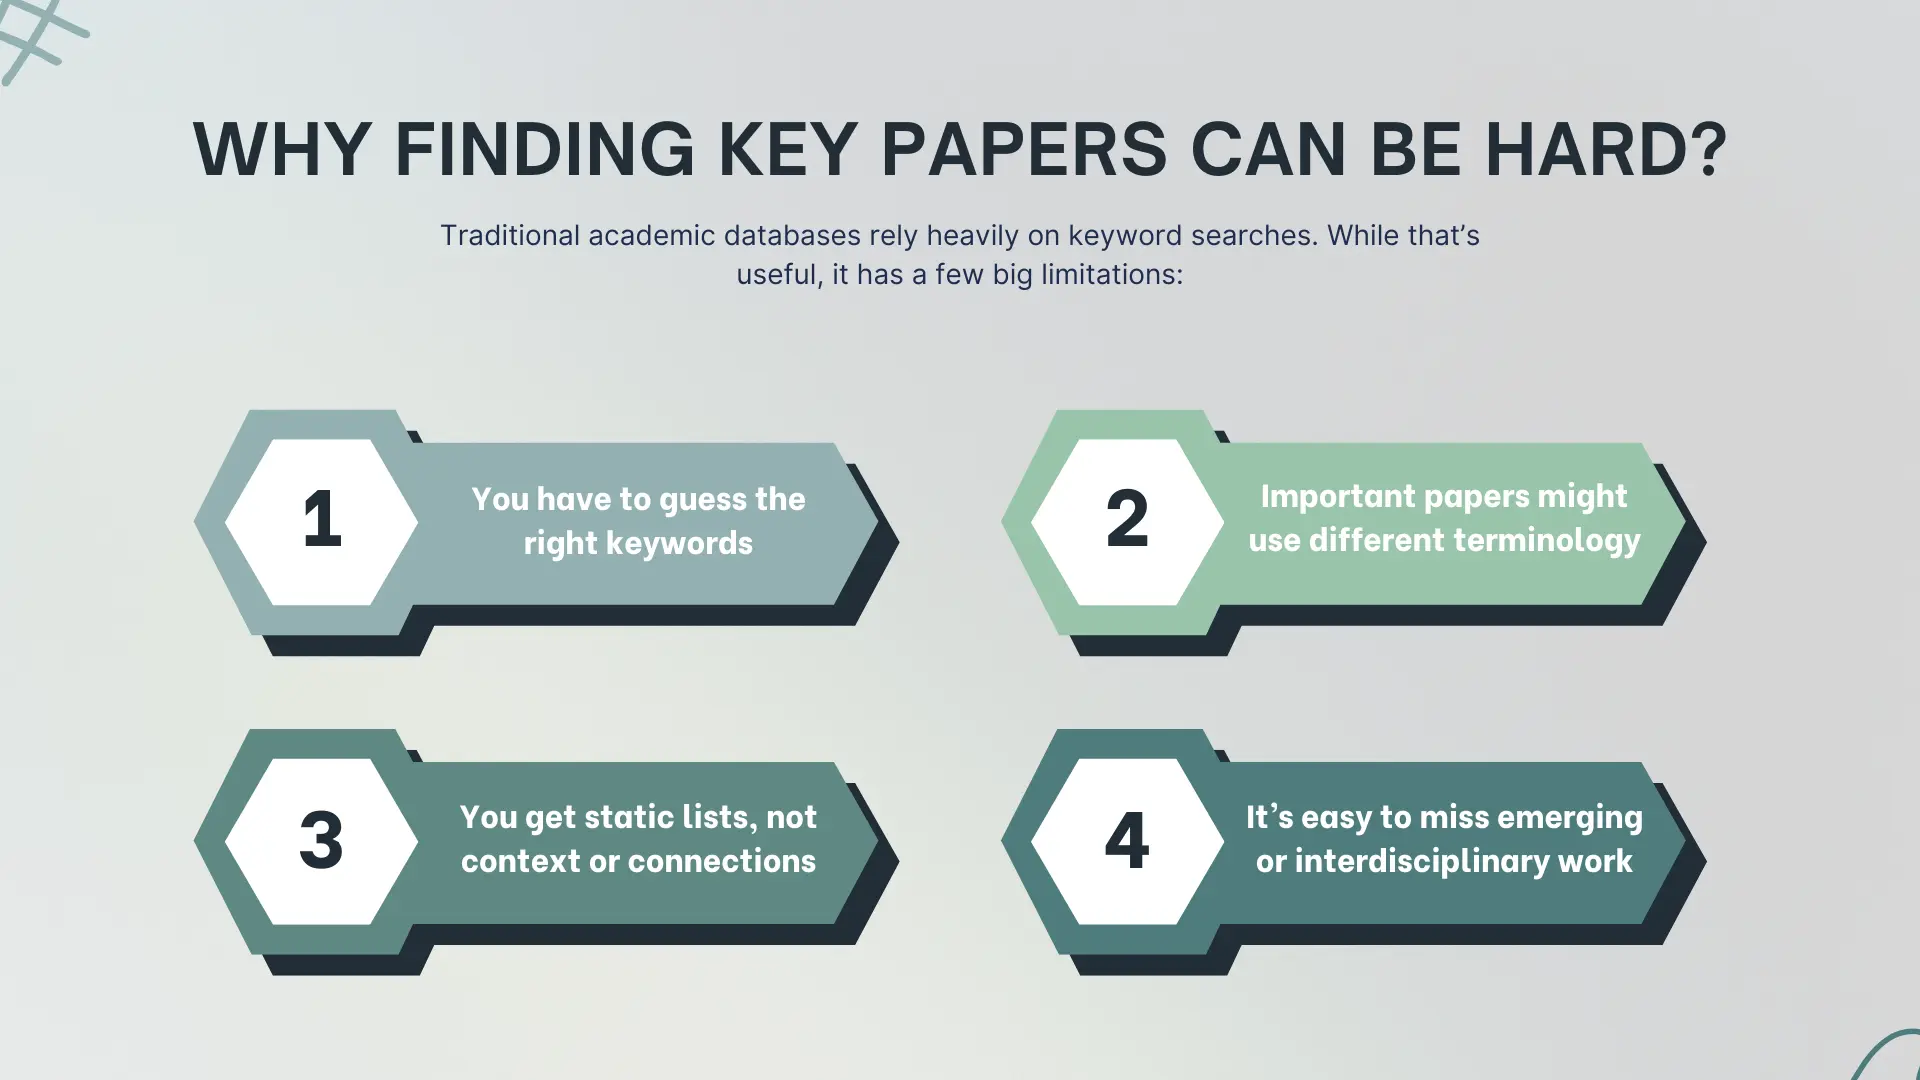
How is it different from Google Scholar?
Google Scholar focuses on keyword search. ResearchRabbit helps you explore connections between papers, making discovery more dynamic and structured.
Do I need to know exactly what I’m looking for?
No, ResearchRabbit is especially useful when you're still exploring a topic.
%20(800%20x%201036%20px).webp)

_cover.webp)


This is a big test comment on your article.